Installing UWP Coil Winding APP on Raspberry pi
Running your Coil Winder Machine on a small computer!
We get asked a lot if our Coil Winding machines can run standalone and the answer is NO due to it needing a computer to run the software.
The next question is can it run on a Apple Mac and again the answer is NO because our software has been developed for PC based systems.
So the conclusion usually is that the customer either uses their existing PC to run the software or buys a Laptop/Desktop to run the software. The latter option can be expensive and add to total cost.
But what about having a small dedicated computer that takes up nearly no room and which is very low cost!
Well the answer is now YES !
Short Introduction to the Raspberry pi
The Raspberry Pi is a series of credit card-sized single-board computers developed in the United Kingdom by the Raspberry Pi Foundation to promote the teaching of basic computer science in schools and in developing countries.
The original model became far more popular than anticipated, selling outside of its target market for uses such as robotics.
Windows 10 IoT Core is a new edition of Windows targeted towards small embedded devices and maker boards such as Raspberry Pi2 or Pi3. IoT core is designed to work with low-level bus interfaces such as Serial, I2C, SPI, USB. You can write a Universal Windows Application using a variety of programming languages in Visual Studio to rapidly create maker projects.
Please note:
Raspberry Pi 2 Model B Supports Windows 10 IOT
Raspberry Pi 3 Model B Supports Windows 10 IOT
Raspberry Pi 3 Model B+ Not Supported but Beta Windows 10 IOT may work
https://devblogs.microsoft.com/premier-developer/getting-started-with-windows-10-iot-core-raspberry-pi-3b/
Raspberry Pi 4 Not supported.
Running a dedicated application in a Windows 10 sandbox is pretty cool and more information can be found on the following link which includes how to setup the development environment for your Raspberry Pi.

Installing Windows 10 on the Raspberry pi
First thing you have to do is install Windows 10 IOT operating system onto your Raspberry pi.
We will not cover how to do this on this page as there are already plenty of pages that will take you through the steps.
Here is the official way to set it up.
Downloading the UWP IOT Coil Winding Software Package
You can download the install package from the link below. Latest release is version 1.4 that was released 13/12/2018
You must be running Firmware V1.9 or below.
Download UWP Coil WInding Software for Raspberry pi
Installing the UWP Coil Winding Software onto the Raspberry pi
Now you have Windows 10 IOT installed on your Raspberry pi, it is now time to install the UWP Coil Winding software.
You can plug the your Coil Winding machine (Must have ARM Controller MKII ) into a spare USB port on the Raspberry pi.
Once you power up you should see something like the following screen shot.
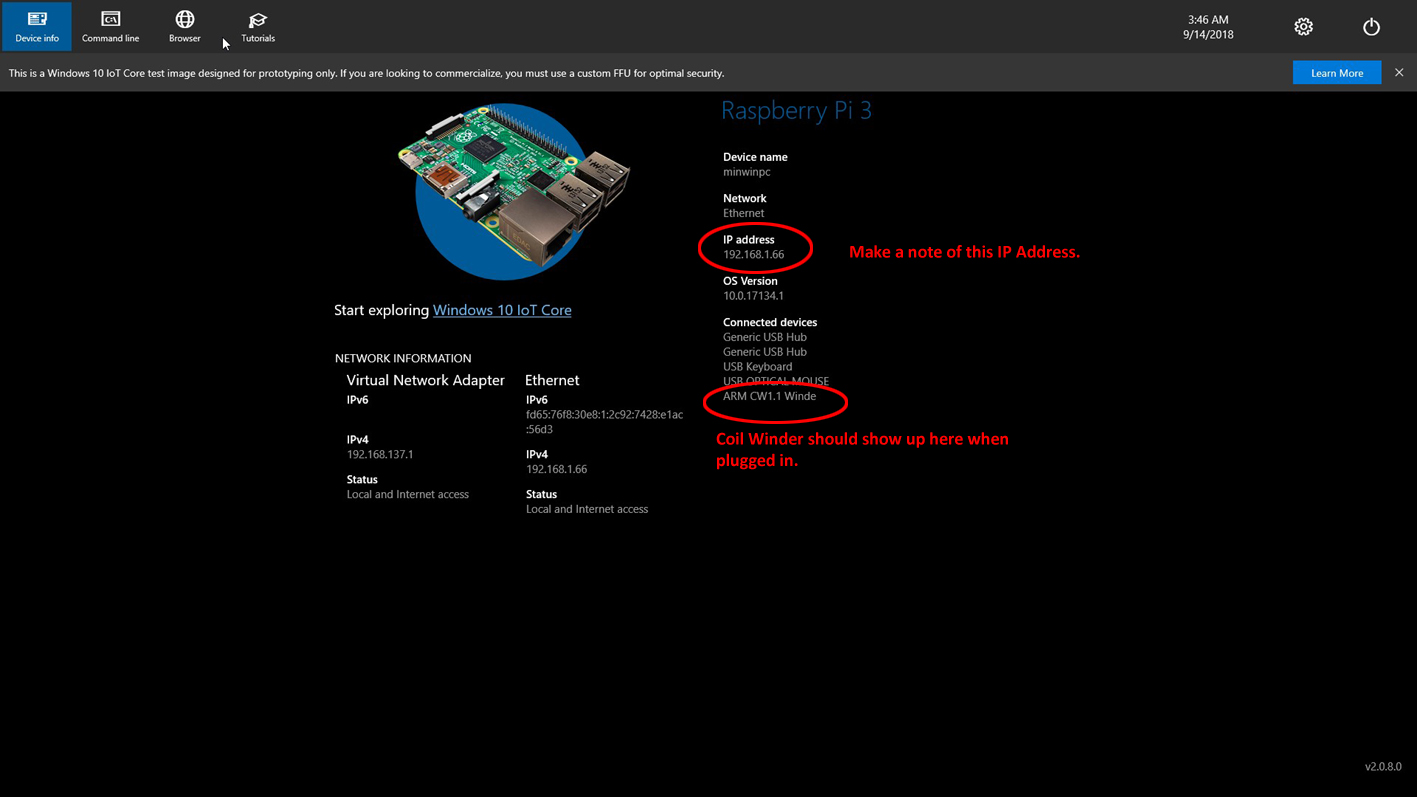

Next launch your web browser and type in the IP Address of your Raspberry pi. Make sure you add the port number.
for Example http://192.168.1.66:8080
This will take you to the Device Portal.
First we will need to install some dependencies and then the application.
Click the Add button and the Deploy or Install Application box will appear.
Click as shown above and use the Explorer window to find the application package.

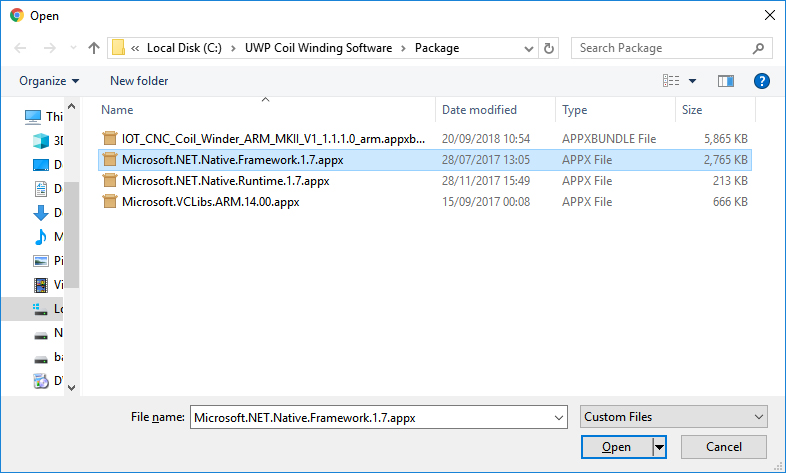
First Select the Microsoft.NET.Native.Framework.1.7.appx and Click Open.
Now click the highlighted button “Next”.


Once installed you should get the following message “Installation Complete – Package Successfully Registered”. (See image)
Click the Done button and then repeat for the other dependencies
Microsoft.NET.Native.Runtime.1.7.appx
Microsoft.VCLibs.ARM.14.00.appx
You may get an error saying you have a newer version installed and if so then this is fine and you can ignore.
Now you have the dependencies installed you can now install the main application.
So repeating the ADD steps again but choosing IOT_CNC_Coil_Winder_ARM_MKII_V1_1.1.1.0_arm.appxbundle
Once it has completed you should now see the Application appear in the list.

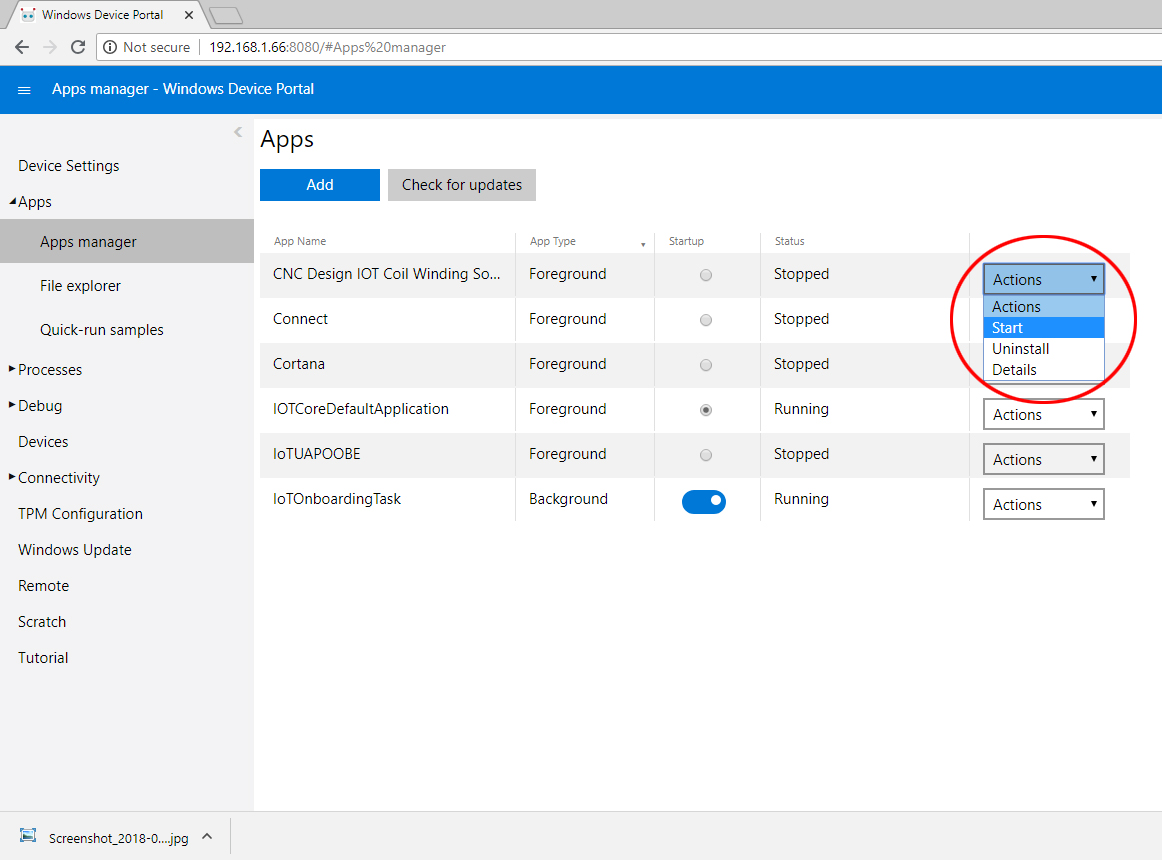
Now we can start the application running by clicking on the actions and choosing Start.
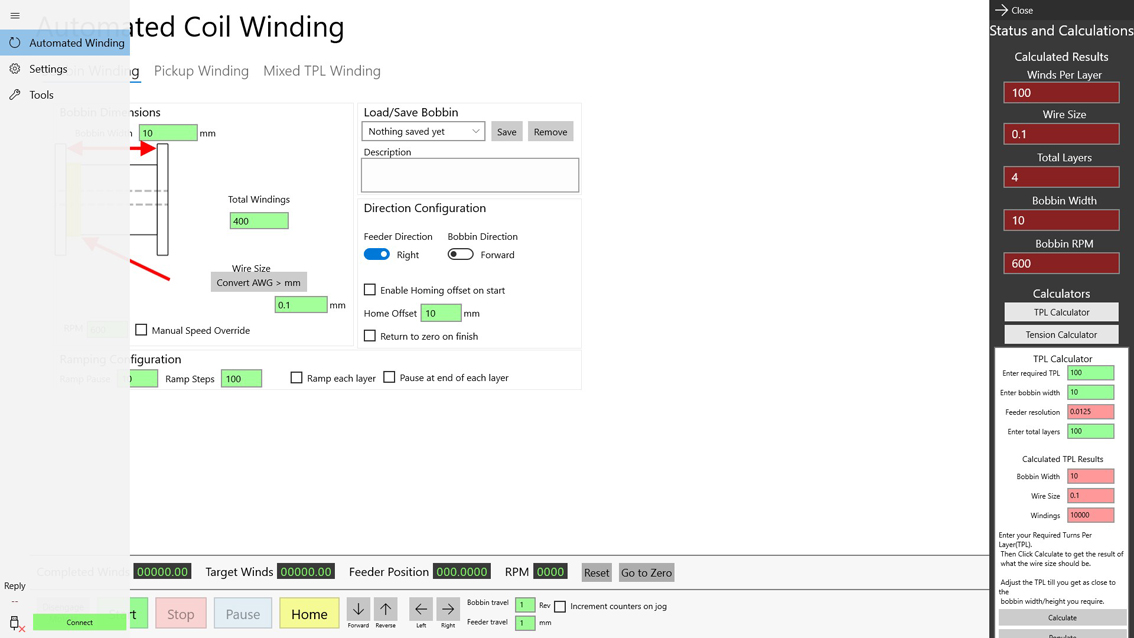
Your Monitor connected to the Raspberry pi should now show the application running.
Now make sure your Coil Winder is connected via USB then click the Connect button which is down the bottom left of the screen and away you go.
We have published the manual online if you get stuck just follow the link below.